The safest route to an Ace Combat 8 Mission 28 S rank is to combine fast bomber interception with efficient high-value kills, timely resupply, and a short Shadow Squadron fight. Do not rely on a single published score threshold: the player run reports disagree about the required score, the importance of time, and whether the requirement changes by difficulty. Treat both score and completion speed as essential.
Your run should have four priorities: destroy every bomber threatening the island, collect valuable fighter kills without getting trapped in long dogfights, enter the final phase with useful ammunition, and attack the Shadows during their predictable slow or straight-flight windows. A checkpoint restart does not appear to make S rank categorically impossible, but it can make the evaluation harder, so a clean mission restart is usually the better choice after a major early mistake.
Use the dedicated Shadow 22 combat guide for the closing dogfight and the aircraft guide for loadout roles. For income rather than rank, compare the full loop with the MRP method.
Version scope — October 7, 2026: This page was edited from supplied research. No numbered game build or independent playtest is recorded for this guide. Check the current in-game descriptions and your platform before applying build-sensitive conditions.
How Mission 28 evaluates your run
Mission 28 does not reward raw target count by itself. Reports include runs with many destroyed aircraft that still received a lower rank, while successful runs combine substantial destruction with controlled pacing. That makes a simple “kill everything” plan unreliable: crossing the map for a low-value target or circling one agile fighter can consume more time than the extra kill is worth.
Build the run around these principles:
- Treat bombers as mandatory threats and intercept them before they complete their approach.
- Use travel time between bomber formations to attack convenient fighters, not distant stragglers.
- Keep afterburner use high during long transitions across the map.
- Spend special weapons freely when they shorten an interception, because the base provides resupply opportunities.
- Preserve enough time and suitable ammunition for Shadow 22 and the accompanying Shadows.
- Avoid deaths and checkpoint restarts whenever possible.
Because the exact grading formula remains unresolved, no fixed score, target count, or time in this guide is presented as a guaranteed cutoff.
Build your Mission 28 loadout
Mission 28 is almost entirely air-to-air combat, so choose a fast aircraft that you can aim comfortably rather than assuming one specific endgame plane is required. Successful player reports used several aircraft, including the F-22A and FA-36. Familiar handling matters because the mission asks you to cross a large battlefield, make rapid bomber passes, and then track unusually agile opponents.
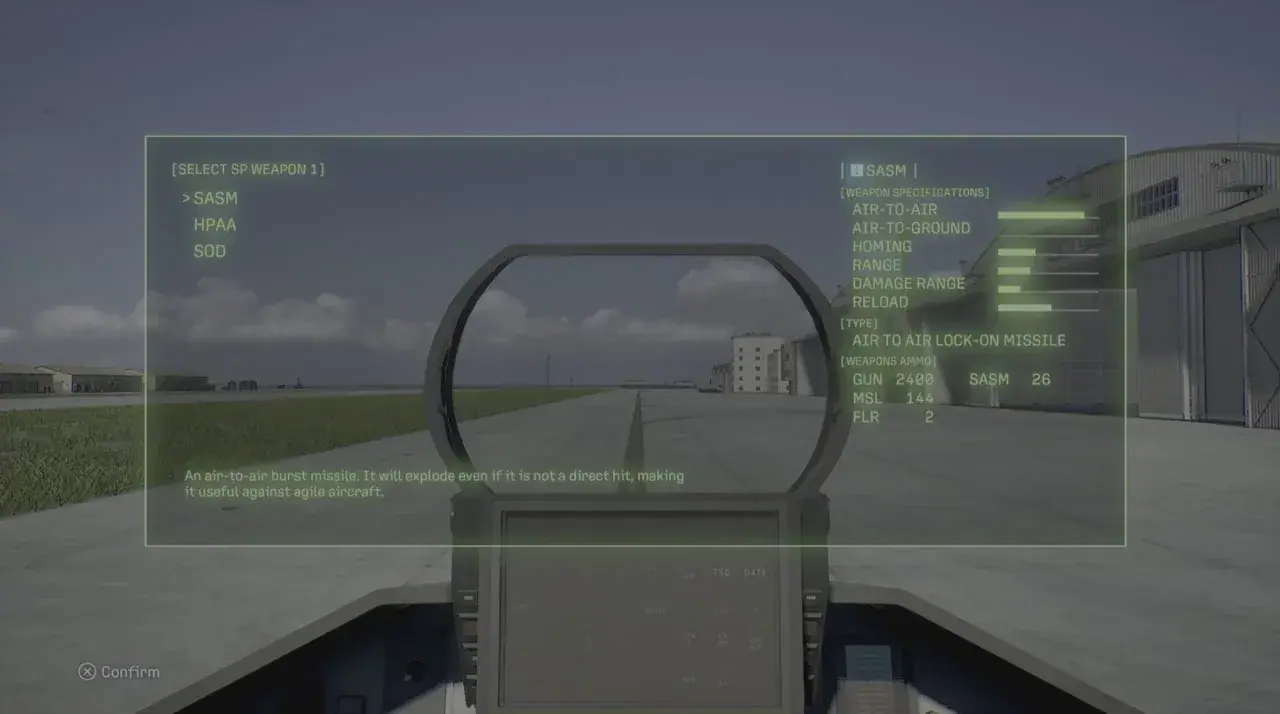
Mission 28 rearm screen showing the SASM selection and replenished ammunition.
Two special-weapon approaches have the strongest support:
| Approach | Best use | Limitation |
|---|---|---|
| QAAM-focused | Fast fighter kills and close attacks on the Shadows | Poorly timed launches can still be defeated by flares or sudden maneuvers |
| SASM-focused | Pressure against agile Shadows and clustered bomber formations | Effectiveness still depends on approach angle, upgrades, and launch timing |
| Gun-supported | Finishing bombers and damaging Shadows during slow, straight flight | Requires stable tracking and disciplined aim |
Favor speed for crossing the map, then improve the weapon you intend to use most. Guidance, power, reload speed, and additional special-weapon ammunition are all defensible choices, but do not spread the build so widely that none of them meaningfully supports your route. If gun aiming is your weak point, a gun-assistance option can make the final phase easier; if you already track targets reliably, missile and special-weapon improvements may save more time overall.
Electronic-warfare wingmen are a useful option because ESM support can improve missile performance when it is active. This is support, not a guaranteed answer to the Shadow fight. Give the squadron permission to use special weapons and switch commands according to the phase: dispersed attacks can occupy the larger formation, while focused forward attacks can help remove a priority target.
Phase 1 route through the bomber waves
The opening is where you establish S-rank pace. Do not begin by dogfighting the nearest escort. Accelerate toward the bomber line and remove the aircraft capable of damaging the island.
- Meet the northern formation early. Use your speed advantage to reach the bombers before they compress around the base. Begin at one end of the line and continue through it instead of turning after every isolated target.
- Finish the formation before changing sectors. Leaving one bomber behind can force a long return trip or allow it to threaten the island while you are occupied elsewhere.
- Use guns together with missiles. A stable bomber is a much easier gun target than a Shadow. Begin firing while closing, then use missiles or a special weapon to finish the pass without orbiting the target.
- Let wingmen disrupt escorts. Dispersed attacks can reduce the pressure on you while you remain committed to bombers. Do not personally chase every fighter that locks onto you.
- React immediately to the faster bomber groups. TU-160 and B-1 formations are repeatedly identified as priority interceptions in successful routes. Break away from optional fighter combat when a new bomber wave is announced.
- Use the nearest-threat rule when several groups appear. Target the bombers with the shortest path to the island, clear that line, and then move to the next formation.
- Take convenient fighter kills during lulls. Escorts directly in your path are useful score, but an extended turning battle is not.
A slow opening is difficult to recover from because it costs time twice: you spend longer clearing the initial formations and enter later phases with fewer opportunities to build score. If bombers repeatedly reach the base or you must cross the entire map for survivors, refine the opening route before attempting to optimize the final boss.
Phase 2 air-superiority scoring
After the bomber defense develops into the timed air-superiority phase, the objective shifts toward reducing the enemy formation until the next allied force can join. This is the best part of the mission for building a score buffer, but only if you keep moving between useful targets.
Prioritize bombers, advanced fighters, and targets that can be destroyed in one clean engagement. Use a shoot-and-split rhythm: launch from a strong angle, confirm the result, and immediately select the next target instead of following a miss through several turns. The battlefield is crowded enough that a new opportunity is usually more efficient than forcing a bad one.
Watch your ammunition before the final transition. The runway becomes available for resupply during the battle, and the mission explicitly encourages you to use it. Land when your special weapons are nearly exhausted or when your remaining loadout would leave you dependent on standard missiles against the Shadows. Approach at speed, decelerate for the landing, rearm, and return directly to combat. A planned resupply is better than discovering during the boss fight that your preferred weapon is empty.
Do not land merely because the option appears. If you still have enough ammunition and high-value targets are close, continue scoring until resupply has a clear purpose. Conversely, hoarding special weapons provides no benefit if the mission ends with unused ammunition and a low score.
Defeat Shadow 22 without losing the run
The final group contains Shadow 22 and the accompanying Shadows. Their flares, abrupt maneuvers, and post-stall movements make repeated long-range missile launches inefficient. Players report inconsistent results from standard missiles, so the dependable strategy is to create an opening and then combine guns with a suitable special weapon.
Attack the wingmen methodically
Removing the wingmen reduces radar clutter and makes it easier to track the remaining aircraft. Keep the squadron attacking rather than ordering everyone to cover you. Select one Shadow, stay close enough to observe its movement, and avoid switching targets every time another aircraft crosses the reticle.
Use a missile to force a reaction, but do not immediately empty the rest of the salvo. The useful windows occur when a Shadow slows for a dramatic maneuver, flies straight while deploying countermeasures, or exits a turn without enough room to change direction again. Move the nose ahead of the aircraft and fire a controlled gun burst. QAAMs are more useful from a close, favorable angle than from a distant rear chase, while SASMs can apply pressure without requiring a perfect direct impact.
Convert Shadow 22’s maneuver into damage
Shadow 22’s signature flip is dangerous if you treat it as a missile invitation from any angle. Instead, anticipate where the aircraft will settle, align the gun reticle with that exit path, and fire as the maneuver slows. If your first burst misses, extend briefly and reset the approach. Remaining in a slow circular chase wastes the clock and exposes you to the rest of the formation.
Do not assume that a visually clean missile launch guarantees a hit. The player reports repeatedly describe missiles veering away, being defeated by flares, or failing during post-stall maneuvers. Whether every such miss reflects the same mechanic is unresolved. The practical response is the same: stop spamming from the same position, close the range, change the angle, and use guns during the next stable window.
Your wingmen may secure one or more kills. That is still progress toward completing the phase; do not waste time trying to reserve every Shadow for the player aircraft. Keep attacking until Shadow 22 is neutralized and the mission advances.
Recover an A- or B-rank attempt
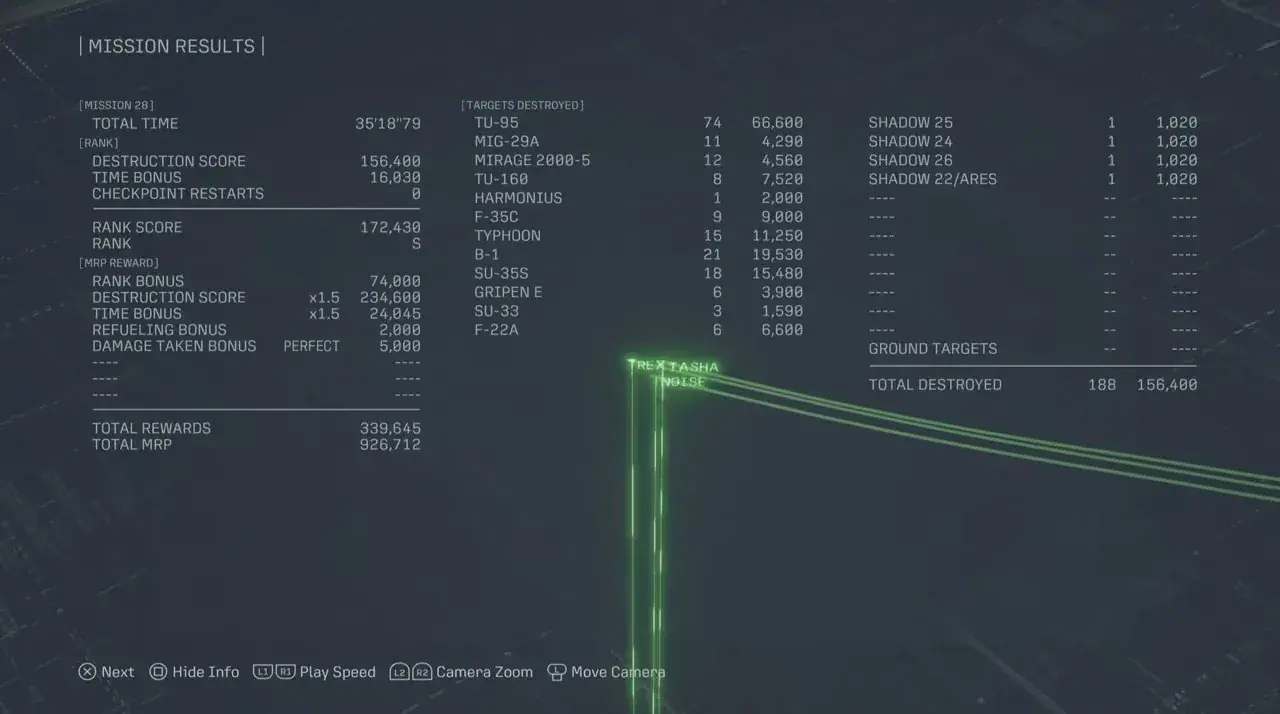
A completed Mission 28 S-rank result with score, time bonus, and destroyed-target totals.
Use the result as a routing diagnosis rather than chasing an unsupported threshold:
| Run symptom | Likely problem | Adjustment for the next attempt |
|---|---|---|
| Bombers reached the island | Opening route or target priority was too slow | Ignore escorts, complete each bomber line, and afterburner between formations |
| High target count but low rank | Too much time went into low-return fighters | Favor bombers and valuable fighters directly along the route |
| Strong score before the boss | Shadow phase consumed the remaining time | Rearm first and use guns, QAAMs, or SASMs only from deliberate openings |
| Repeated missile misses | Launches were made during flares or violent maneuvers | Wait for straight flight, a close head-on pass, or the end of a post-stall move |
| Empty specials at Shadow 22 | Resupply timing was too late or skipped | Schedule a runway visit before committing to the final group |
| Clean late phase but still below S | Earlier travel and interceptions were inefficient | Restart and optimize the first bomber waves rather than farming more at the end |
| Checkpoint restart during the run | Evaluation may have lost too much margin | Use a full mission restart when pursuing S rank |
Practice the mission in sections. First learn a bomber route that never leaves a distant survivor. Then learn where the resupply fits without disrupting the air-superiority phase. Finally, practice using missiles to provoke the Shadows and guns to punish their slow windows. Once those three pieces are repeatable, combine them into one clean run.
The essential S-rank plan is simple: clear bombers before escorts, score continuously while crossing the battlefield, spend and replenish special weapons instead of hoarding them, and refuse to waste the final minutes launching missiles from bad angles at Shadow 22.