Destroy the shielding over Chandelier's cooling units, attack the exposed cooling targets, and then focus the barrel core when the barrel opens. When backup cooling closes the hatch, switch to the newly marked backup units to force another opening. Throughout the fight, intercept the missiles being carried toward the gun so the allied city survives long enough for your team to finish the railgun.
The boss has two connected objectives: protect the city from its missile attacks and destroy the launch device. Clearing cooling targets alone does not immediately finish the operation. They create the conditions for the vulnerable barrel core to become accessible, and that core is the target you must ultimately destroy.
This guide covers Chandelier's ACE COMBAT 8 Online Emergency Sortie. Use the current target markers and radio updates to identify the active phase. Do not plan around a fixed cooling unit total, a guessed missile loading timer, or a tunnel route from an earlier game; the reliable sequence is the change in objectives announced during this fight.
Understand the fight as a sequence of openings
The essential progression is:
- Remove shielding and destroy the exposed external cooling units.
- Follow the mission update to additional cooling targets.
- Attack the barrel core when overheating forces the barrel open.
- Destroy backup cooling units when the hatch closes again.
- Return to the core when the barrel reopens, then evade the collapse after its destruction.
Missile interception runs alongside those stages. It is not a separate task that can be postponed until the team has finished all the cooling targets. The city is already under attack when the operation begins, so the team needs to watch both the phase objective and the loading threat.
The easiest way to lose track of the fight is to treat Chandelier as one large target and keep firing at whatever part is nearby. Its vulnerable objective changes. After a phase announcement, check the new marker and adjust your approach instead of continuing to attack the location that was useful a moment earlier.
Think of cooling targets as the mechanism that opens the damage opportunity. The barrel core is the opportunity itself. That distinction explains why a successful cooling phase can be followed by another set of targets rather than an immediate victory screen.
Remove shielding before attacking the cooling unit
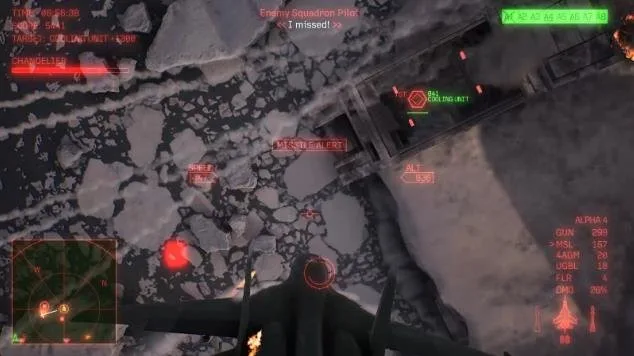
The COOLING UNIT marker identifies the component to attack after its shielding is removed.
The initial cooling targets are protected by shielding. Attack the shielded structure until the protective layer is down, then attack the cooling unit it exposes. A shield destruction call and a cooling unit destruction call describe different progress; do not assume the first means the whole target has been removed.
Approach from an angle that gives you a view of the marked target and an exit path. If a structure blocks the target, change your line of attack instead of repeatedly firing into the obstruction. Chandelier is large enough that an approach suitable for one marked component may be unsuitable for another.
Use the radio confirmations to track the team's progress. A teammate can remove shielding while you are approaching; another can destroy the exposed unit before you complete the pass. Recheck the current marker rather than spending ammunition at a target that has already been resolved.
If you are attacking a cooling unit while the team is spread around the boss, make your own pass specific. Identify the target, line up, deliver the attack, and leave the immediate structure with room to turn. Repeated close circling makes it harder to see whether the unit remains active and increases the risk of hitting the surrounding geometry.
Keep going when additional cooling targets appear
After the first external cooling targets are destroyed, the mission analysis identifies additional cooling units. This is part of the encounter's progression. The railgun remaining active at that point does not, by itself, mean your attacks failed or the operation is stuck.
Wait for the updated target information and use the new markers. A familiar component of the boss can distract you after the update, particularly if you have just spent several attack passes on it. Confirm that the target you are selecting belongs to the current objective before committing another weapon.
The new cooling targets must be cleared to bring the main gun to the overheating state. Keep the missile loading warnings in your attention while doing that work. A team that focuses only on finishing this stage can make good boss progress while allowing the other objective to fail.
If there are no useful cooling targets in your forward view, use the radar and marked objectives to select your next approach. Do not infer that all cooling work is finished solely because your current side of the boss looks quiet. The phase confirmation and the barrel opening announcement provide a better signal.
Intercept the missile before it reaches the barrel
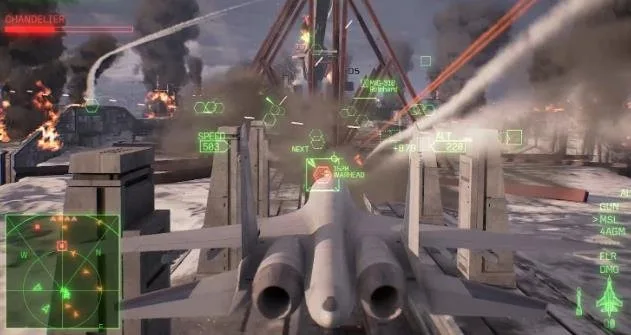
Watch the WARHEAD target during loading warnings so missile defense continues alongside boss damage.
Chandelier's missiles are stored on a conveyor beneath the main gun before being loaded into the barrel. The mission dialogue identifies destroying them on that conveyor as the quicker way to prevent the city strike. When the firing sequence or loading warning arrives, make that missile an immediate team priority.
An interception is complete when the missile's destruction or failed loading is confirmed. A hit confirmation alone is not enough. The missiles are described as heavily armored, so continue the attack until the threat is actually removed or another teammate's destruction call resolves it.
Do not rely on a fixed number of seconds between every warning and launch. The practical cue is the current loading or firing announcement, together with the marked missile. React to that state rather than waiting for an estimated timer to reach a familiar number.
The conveyor area also requires a clear approach. If you lose sight of the missile behind the structure, reposition to regain a useful line rather than guessing its location and spending ammunition blindly. Leave yourself a route away from the gun after the attack, especially if your pass brings you close to the boss.
Share the city defense and boss damage jobs
A useful team plan gives someone clear responsibility for checking missile warnings while others work through the cooling targets. It does not require a universal aircraft count or a fixed number of players assigned to every role. The important point is that missile defense remains covered during a damage phase.
If the current defender is unable to reach a loading missile, another player should be ready to switch. A rigid plan can fail when its assigned aircraft is out of position or out of suitable ammunition. Reassess the jobs as the fight changes, while keeping the immediate threat visible.
Likewise, avoid having the whole team chase the same already damaged cooling unit while a loading missile is left unattended. Radio confirmations help you recognize when a teammate has completed the target and your next pass would be redundant. Shift to another active objective rather than waiting for a personal destruction credit.
During a barrel opening, core damage becomes a valuable opportunity, but the team still needs to hear the loading warnings. The core and the missile may both demand attention within the same broad phase. Successful coordination keeps one task from silently displacing the other.
Attack the barrel core while the hatch is open
Once the main cooling units are lost, overheating forces Chandelier to open the barrel for emergency cooling. The radio identifies the barrel core as vulnerable and calls for focused fire. This is the moment to stop treating exterior cooling targets as your principal damage destination.
Line up with the core's current marker and an approach that actually reaches it. An open hatch gives access; it does not make every angle around the railgun equally effective. Check your selected target before releasing a special weapon or beginning a gun pass.
The interior is narrow. Control your speed and alignment so you can attack without turning the damage opportunity into repeated collisions. If your approach is poor, leave and realign rather than forcing an extreme correction inside confined geometry. There is no universal high speed tunnel route in this guide.
Listen for damage confirmations and keep the attack focused while the core remains accessible. At the same time, preserve awareness of your exit and the next phase call. A useful pass ends with your aircraft positioned to continue the operation; staying in the structure after losing a clear line does not add useful damage.
Switch to backup cooling when the barrel closes
Chandelier activates backup cooling and closes the barrel hatch during the fight. Once that happens, continued attacks at the former opening are no longer the same damage opportunity. The radio explicitly directs the team to destroy backup cooling units so the barrel will reopen.
Select the newly marked backup targets and move into a suitable approach. The current marker matters more than a remembered location or a cooling unit count from another guide. Your previous core attack position may not be useful for the new targets, so give yourself room to reposition.
Do not confuse a damaged backup unit with a destroyed one. Watch for the destruction confirmation and move to the next active marker. Teammates may be handling different units simultaneously, making the target list a better guide than counting only the objects you personally attacked.
When the final backup cooling unit is destroyed, the barrel opens again for cooling. Shift back to the core promptly. The purpose of the backup phase is to restore that vulnerable opening, so remaining near a destroyed cooling unit wastes the advantage your team just created.
Choose equipment for targets you can actually reach
Bring a loadout that can repeatedly attack surface components and still contribute when the core is exposed. A weapon's name or nominal power is less useful than an approach that reaches the marked target. Chandelier's shielding, conveyor, and interior geometry make attack angle a central part of the choice.
Before the sortie, consider how you will handle both a cooling target and a loading missile. If one special weapon suits only your preferred boss pass, retain another practical attack option for the defensive objective. Ordinary missiles and gun attacks can remain part of that plan; special ammunition should not be wasted merely because a large structure is in view.
Check the active weapon before each pass and watch ammunition during the operation. A long fight can leave a player with the right target in sight and the wrong weapon selected, or no ammunition in the planned attack type. Respond to the remaining loadout rather than repeatedly attempting an empty selection.
Electronic support can complement a team plan, but it does not remove the need to hit the active objectives. This guide does not assign a guaranteed ESM reload effect or a specific support multiplier to the encounter. Base the plan on the equipment descriptions and results visible in your own sortie.
Recognize common reasons that progress stalls
The shield is gone, but the phase has not advanced. Attack the exposed cooling unit and wait for its destruction confirmation. The shielding and the cooling unit are separate tasks.
The first cooling targets are cleared, but Chandelier is still active. Follow the update to additional cooling units. The first clear is not the end of the cooling sequence.
The core was taking damage, then attacks stopped helping. Check whether backup cooling has closed the hatch. If so, switch to the backup units to create another opening.
The city is threatened while the team is making boss progress. Respond to the loading missile on the conveyor. Destroying cooling targets does not automatically confirm that every missile has been intercepted.
A close attack pass ends in a collision. Improve the alignment and exit path before repeating it. The interior is narrow, and copying a route from another ACE COMBAT title is not a substitute for reading this encounter's geometry.
Finish the core, then leave the collapsing structure
After the reopened core takes enough damage, its destruction triggers Chandelier's collapse. The radio tells the team to evade. Stop pursuing an extra attack pass and fly away from the collapsing structure with a clear route.
The full loop is shielding, cooling, additional cooling, open core, backup cooling, and reopened core, with missile defense maintained throughout. Let the target markers and radio calls move you between those jobs. Once you understand why each phase opens the next, the fight becomes a series of specific tasks your team can recognize and complete.